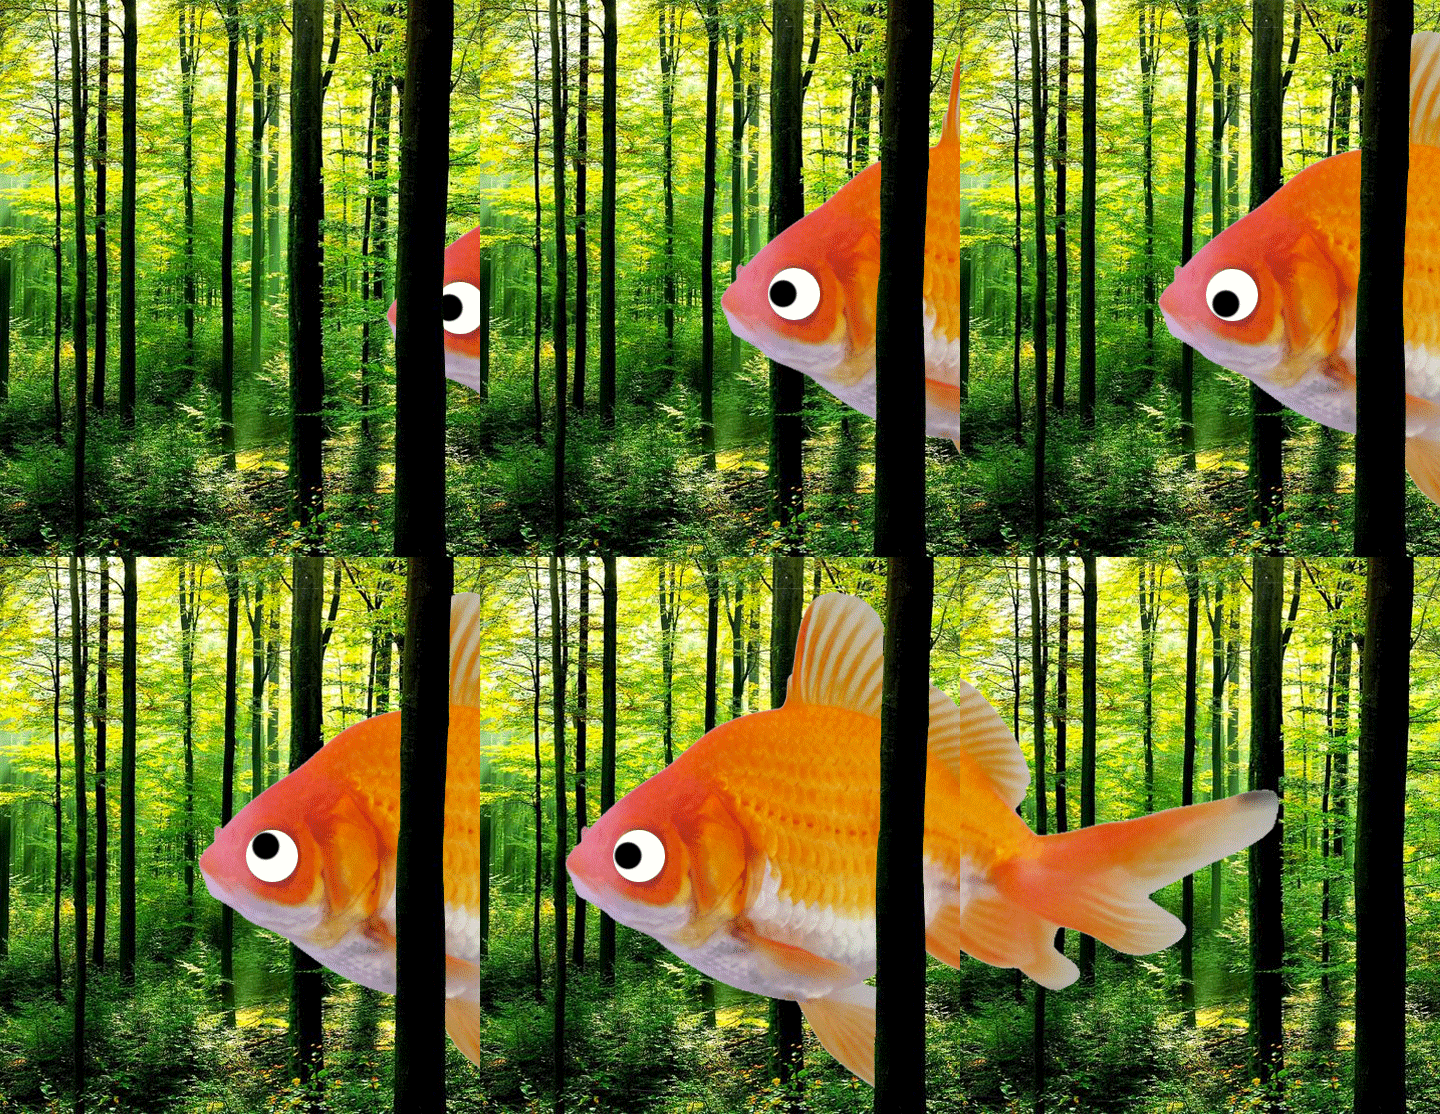
First - let's make a folder on the desktop called "Arts 140 N Salley". We'll be saving all our files here.
For this exercise we’re going to build a very simple 8-frame GIF animation in Photoshop. This is a bare bones GIF composed of just 2 (or 3) separate layers. An image of forest trees will be our background and the animated layer will a goldfish. I tend to ad background layers first and then bring in the animated layers later – but you can build the composition either way.
1, Open Photoshop and create a new file by clicking File/New. When the box opens make the file 480 pixels x 557 pixels x 72 dpi color mode RGB. This is the size I used for the class web page.
2, Add background: Copy and paste a jpeg image from folder, picture file, web etc. Its best if the image exceeds the size of our canvas (480 x 557). Forest example - http://assets.worldwildlife.org/photos/946/images/story_full_width/forests-why-matter_63516847.jpg?1345534028
3, Resize the image so a portion of it fills the frame of the Photoshop document by using edit/transform/scale.
4, Add the “animated” layer(s) the same way we added the background. Copy and paste a jpeg image into the Photoshop document. Its best if this image isn’t too small relative to the background – when you enlarge a small image the image quality (resolution) will be effected.
Example - http://murphymeadow.com/26/goldfish-23.jpg
or...http://www.xtremekoi.sk/files/karas-zlaty.jpg
http://www.goldfish-as-pets.com/images/dreamstime_5422385cometgoldfish.jpg
5, Clean-up the image. Cut any background away using the Magic wand and Polygonal lasso tool.
6, Rest the curser over the layers panel and select large thumbnails (just my preference).
7, Position your fish layer as if it were the first frame of your animation. (The fish might be positioned entering from the right or left side of frame.)
8, Lets start animating! Open-up the timeline by clicking window/timeline. Be sure “create frame animation” (not create video timeline) is selected and then click the box. Your first frame of animation should appear. Go to the layers panel select the fish layer. Position the fish so his face is just poking into frame. This will be the first frame of your GIF animation.
9, Click the "duplicate selected frame" icon in the control panel below the timeline frame. Now move the fish a little more into frame.
10, Make 8 frames of animation by clicking the “duplicate selected frame” icon and moving the fish a little each time. Try and make it so the fish moves evenly across the frame and then out by the time you reach frame 8.
11, Be sure “forever” is selected in the lower right of the timeline and that each frame is set for .01 seconds. Click the play icon and you should see your animation move.
IMPORTANT! To preserve all your layers you must save this as a Photoshop file.
To save it as a GIF animation go to file/export and then select “save for web (legacy)” Save it in the "ARTS 104 N Salley" folder on your desktop so you can easily retrieve it.
Hint: Don’t be afraid to delete and redo your timeline animation frames! Things can get pretty quirky when you start moving elements around. Just be sure not to delete your photoshop layers. Add more complexity after you get the hang of it!
Adding a little complexity:
1, Save your work then delete all animation frames in the timeline.
2, Duplicate the fish layer. Using the elliptical marquee tool, replace the fish’s eye with a white circle. Duplicate this new fish layer 3 times, label them A, B and C
3, Select the brush tool – (circular size 27) make the brush color black and ad an eyeball in a different place on each of the A, B, C fish layers.
4, Move the fish layer you want to start with (lets say layer A) off to the right of the frame.
5, Make 10 frames of animation by clicking the “duplicate selected frame” icon in the menu bar (next to the trash can).
6, Click each successive frame in the timeline window and move the fish to the right. When the fish is in position for the eye to start to move (lets say 6 frames) go to the layers panel and click off the A layer and click on B layer so the fish’s eye appears to move. Position the B layer fish.
7, Click on the next successive fame in the timeline window (frame 7) and then click off layer B and on layer C so the fish’s eye appears to move again. Position the C layer fish.
8, Click on the next successive frame in the timeline (frame 8) window and select layer A again so the fish’s eyeball is looking straight.
9, Continue to move the fish out of frame.
10, Finally – ad a bit more time to the frames where the fish is looking around so it appears he pauses a bit.
Try out your animation!
Making Animated GIFs


